
More roof leaks trace back to flashing than to the shingles themselves, yet flashing rarely gets a second thought until water starts showing up on a ceiling below. Flashing is the thin metal barrier installed anywhere a roof surface meets something that interrupts it, such as a chimney, vent pipe, skylight, or wall, and its entire job is to keep water from finding a way in at these vulnerable transition points. A well-maintained flashing system often costs far less to repair than the interior damage caused by ignoring it, which is why catching problems early matters so much. Camden Roofing repairs and replaces flashing across Charlotte and Raleigh homes regularly, and this guide explains how flashing fails, what a proper roof flashing repair involves, and what homeowners can expect to pay.
Why Flashing Fails Before Shingles Do
Flashing takes on a different kind of stress than the surrounding shingles. Metal expands and contracts with temperature swings far more than asphalt shingles do, which gradually loosens the seal between flashing and roofing material over years of seasonal change. Sealant used around flashing edges also breaks down from ultraviolet exposure faster than the shingles it protects, since it is often applied as a thinner, more exposed layer. Add in the fact that flashing sits at a roof’s most complex geometry, where water naturally concentrates during storms, and it becomes clear why this small component fails well before the rest of a roof shows its age. Even high-quality flashing installed correctly will eventually need attention, since no sealant or metal joint lasts forever under constant exposure to sun, rain, and temperature swings.
Understanding Chimney Flashing Leak Patterns
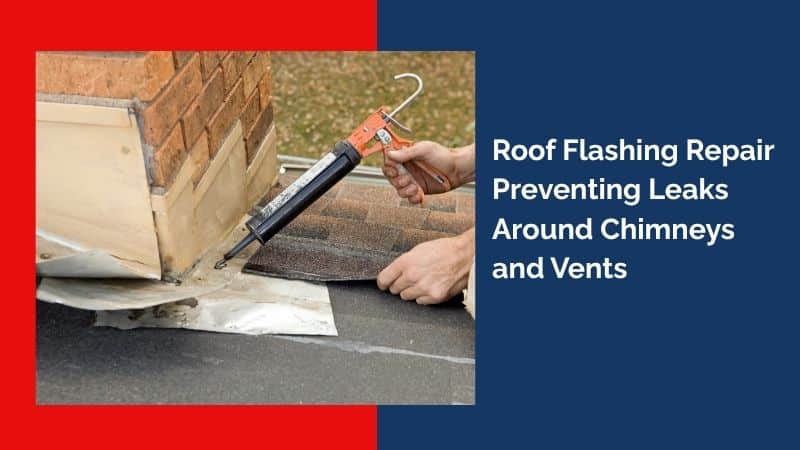
A chimney flashing leak typically shows up as water staining on a ceiling or wall near where the chimney passes through the interior of the home, even though the actual entry point sits at the roofline outside. Chimney flashing usually consists of two layers, a base flashing attached to the roof deck and a counter flashing embedded into the chimney’s mortar joints above it. When either layer separates, corrodes, or the sealant between them fails, water follows the chimney down into the attic or wall cavity rather than draining harmlessly off the roof. Homeowners often notice this type of leak specifically during wind-driven rain, since sideways moisture finds gaps that a straight downpour would not reach.
Roof Vent Flashing and Common Failure Points
Roof vent flashing surrounds the pipes and stacks that extend through the roof for plumbing and ventilation systems. Most vent flashing uses a rubber boot fitted around the pipe, and that rubber component typically wears out well before the surrounding metal base does, usually within ten to fifteen years depending on sun exposure. Cracked or shrunken rubber boots allow water to seep directly down the pipe into the attic below, often producing a slow, hard-to-trace leak that only becomes obvious once ceiling damage has already progressed. Checking vent boots during any roof inspection catches this common failure point long before it causes real damage.
What a Proper Flashing Replacement Involves
Flashing replacement is rarely a simple caulk and patch job if it is done correctly. A proper repair involves removing the surrounding shingles or roofing material near the flashing, replacing the flashing itself with new metal cut and formed to fit the specific chimney, vent, or wall condition, and reinstalling shingles with correct overlap so water sheds naturally over the new flashing rather than around it. Sealant plays a supporting role in this process, not the primary one, since a well-formed and properly layered flashing system should shed water mechanically even before sealant is applied.
Flashing Replacement Cost Factors
Flashing replacement cost depends heavily on what type of flashing is involved and how accessible that part of the roof is. Simple vent boot replacement tends to sit at the lower end of the price range, since it involves less material and less roof disturbance. Chimney flashing repair costs more due to the additional labor of working around masonry and often coordinating both base and counter flashing layers. Steep roofs, tall chimneys, or flashing located in hard-to-reach areas add both time and safety equipment requirements, which increases the total cost compared to a straightforward, easily accessible repair on a single-story home.
Warning Signs That Point to Flashing Problems
Interior water stains that appear near a chimney, vent pipe, or where a roof meets a wall are the clearest indicator of a flashing issue rather than a general roofing problem. Visible rust streaks running down a chimney’s exterior brick, gaps or lifted edges in the metal itself, and cracked sealant lines around any roof penetration are all signs worth acting on quickly. Musty odors in an attic near these areas, even without visible staining yet, can indicate slow moisture intrusion that has not fully surfaced inside the home. Checking these spots after any major storm, rather than waiting for a scheduled seasonal inspection, often catches a developing problem while it is still an easy and inexpensive fix.
Why DIY Flashing Fixes Often Fall Short
Homeowners sometimes attempt a quick fix using roofing cement or caulk applied directly over a visible gap, and while this can slow a leak temporarily, it rarely solves the underlying problem. Sealant applied over corroded or improperly overlapped flashing tends to crack again within a season or two, and repeated patch attempts can actually make a later professional repair more complicated by trapping moisture beneath layers of old caulk.
A correctly executed flashing replacement addresses the mechanical shedding of water first, which holds up far longer than any surface-level sealant application alone. Homeowners who want to extend the life of existing flashing between professional visits can safely clear debris away from the area and watch for early warning signs, but any actual repair work involving metal forming or shingle removal is best left to a trained roofing crew.
Flashing Around Skylights and Wall Junctions
Chimneys and vents get most of the attention, but skylights and roof-to-wall junctions face similar flashing challenges. Skylight flashing typically uses a step flashing pattern along the sides combined with a continuous piece at the top and bottom, and any gap in that overlapping sequence gives water a direct path into the room below. Roof-to-wall junctions, common where a lower roofline meets a second-story wall, rely on step flashing tucked behind siding material, and siding repairs or replacements sometimes disturb this flashing without homeowners realizing it happened until a leak appears months later.
How Often Flashing Should Be Inspected
Flashing does not need attention as often as gutters or shingles, but it should still be checked at least once a year, ideally as part of a broader roof inspection. Homes with older flashing, extensive tree coverage, or a history of leaks benefit from checking twice a year, particularly before and after the season with the heaviest rainfall. A visual check from the ground with binoculars can catch obvious lifted edges or rust, though a closer inspection from the roof itself is the only way to properly assess sealant condition and rubber boot wear around vents.
Flashing might be one of the smallest components on a roof, but it is responsible for stopping some of the most damaging leaks a home can experience. Camden Roofing diagnoses and repairs flashing issues around chimneys, vents, and skylights across Charlotte and Raleigh with a focus on lasting results rather than temporary patches. To learn more about our team or explore our roof repair services, schedule an inspection today.
Frequently Asked Questions
1. How do I know if my roof leak is caused by flashing?
Leaks near a chimney, vent pipe, or wall junction almost always point to flashing rather than shingles, especially if the stain appears during wind-driven rain.
2. How long does roof flashing usually last?
Metal flashing itself can last decades, but rubber vent boots and sealant around it typically need replacement every ten to fifteen years depending on sun exposure.
3. Can flashing be repaired without removing shingles?
Minor sealant touch-ups are possible, but a lasting repair usually requires removing nearby shingles to properly reset or replace the flashing underneath them.
4. Is chimney flashing repair more expensive than vent flashing repair?
Yes, chimney flashing typically costs more due to the added labor of working around masonry and coordinating both base and counter flashing layers correctly.
5. Can I just caulk over a flashing leak myself?
Caulk can slow a leak temporarily, but it rarely fixes the underlying issue and often needs to be redone within a season or two.